
So, you’ve picked out a new floor and it looks great. But here’s the thing: moisture can hide underneath and cause big trouble. It might be stuck in the concrete or coming up from the subfloor. If you don’t catch it early, your floor could end up warped, lifted, or even mouldy. Moisture testing helps you check before laying anything down. It’s a small step now, but it can save you loads of hassle later. Floors are expensive, but getting them wrong? Even more so.
What Is Moisture Testing for Floors?
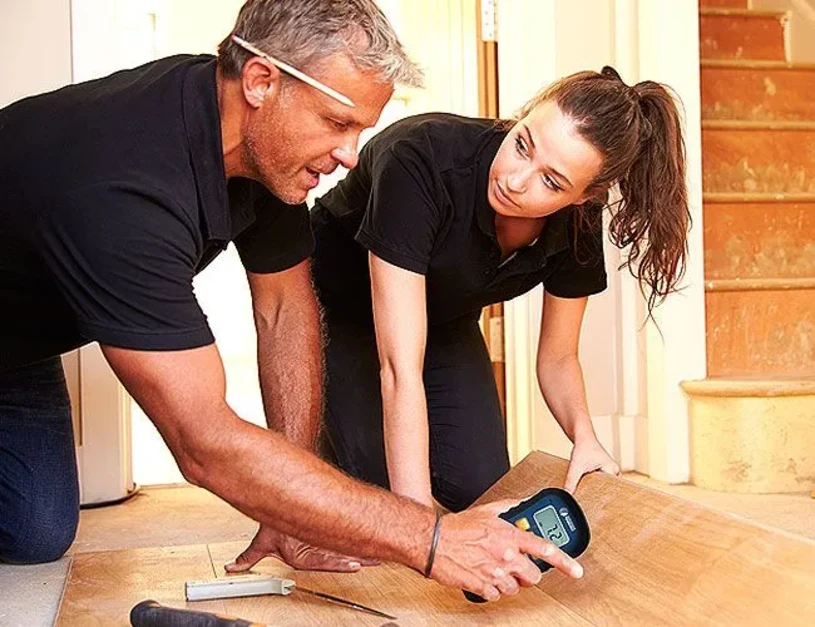
Moisture testing checks if your floor or the surface below it holds too much water. It shows the moisture content inside materials like concrete, timber, or screed. To test for moisture, you might use a probe or a special moisture meter. Some tools check the surface. Others go deeper. If the reading’s too high, you’ve got to wait or deal with the problem first. Skipping the test can lead to ruined floors, failed adhesive or coatings. That’s why it’s always worth doing.
Why Moisture Is a Major Cause of Floor Failures?
Moisture problems don’t always show up straight away. Sometimes the floor looks fine for weeks, then it starts lifting or smelling. When there’s too much water in the base, it causes all kinds of damage. Excess moisture breaks down glue, weakens joints, and ruins finishes. Vapour rises up, and that’s when things go wrong. Wood flooring will swell and warp. Tiles might shift. Carpets can trap moisture and start growing mould. It’s easier to fix it before than to rip everything up after.
Common Signs of Moisture Damage
You don’t always see it right away, but moisture leaves signs. You’ve just got to know where to look.
- Resin coatings with blisters are a common sign of trapped moisture. Water is trying to escape from impervious floor coatings, and the pressure is stronger than the bond of the material.
- Floor coverings peeling up means the adhesive underneath is likely breaking down because the subfloor is too damp.
- Musty smells or mould patches under floor coverings mean moisture issues that have built up over time, especially in older buildings.
- Stains or dark marks on the concrete floor often mean vapour is coming up from below and causing slow damage.
Flooring Types at Risk
Most floor types don’t like moisture – but some react worse than others. That’s why it’s important to test before installation.
- Wood flooring absorbs water quickly. The boards swell, shift, and can crack. Moisture content needs to be just right before you lay it down.
- Floor Coverings often rely on strong adhesive. If the subfloor is damp, the bond won’t hold, and the floor will lift or bubble.
- Carpets and underlay can trap damp between layers. This allows mould to grow underneath without you noticing, especially if you rarely lift it.
- Concrete floors hold moisture deep inside. Even if the surface feels dry, it might not be. You need to measure moisture properly before covering it.
How Moisture Testing Helps Prevent Flooring Failures?
You can avoid a lot of hassle just by testing first. Moisture testing tells you if the floor’s dry enough to build on. If not, you can dry it, seal it, or use a barrier. You also know which adhesive or system is safe to use. It’s not guesswork-it’s a simple check with big benefits. Moisture issues cause major delays and repairs. This one step can keep your floor flat, clean, and long-lasting. That’s the importance of moisture in planning: ignore it, and it’ll cost you.
Prevents adhesive/coating failures (blistering, delamination)
Moisture weakens adhesives and coatings from the inside out. When damp rises through a slab or subfloor, it stops the bond from holding properly. That’s when you see coatings blister or peel away and tiles start to lift. Adhesives are designed to stick under certain conditions, but water breaks the chemistry. By testing moisture levels before you install, you make sure the products can perform as intended. This one step stops early failure and keeps your floor looking solid.
Avoids surface dusting and premature wear that contaminate operation
Too much moisture in concrete often causes surface dusting. The top layer weakens, breaks down, and spreads fine particles across the space. In commercial sites, this dust contaminates equipment, reduces air quality, and affects daily operations. In homes, it leaves the floor constantly dirty and worn out. Moisture testing helps you avoid this by showing if the base is strong and stable enough before you cover it. A dry foundation means a cleaner, longer-lasting finish.
Reduces corrosion risk to fixings and sensitive equipment
Metal fixings, fasteners, and even electrical systems near floors are at risk when moisture is present. Damp conditions encourage rust and corrosion, which shorten the lifespan of building parts and sensitive equipment. Once corrosion sets in, it spreads quickly and often requires costly replacement. Moisture testing gives you the chance to stop this before it begins. By identifying and controlling damp at the start, you protect not just the floor but everything connected to it.
Saving time and money by avoiding reinstallation
Moisture damage is expensive. It ruins materials, wastes labour, and causes delays. If you skip testing and the floor fails, you’ll end up redoing the whole thing. That means new flooring, more work, and extra costs. Testing helps you avoid all that. It takes minutes but saves you hours (and hundreds of pounds).
Compliance with manufacturers’ warranties and British Standards (BS8201/BS8203)
Most flooring brands have rules about moisture. They’ll say you must test before installing. If you don’t, and the floor fails, they won’t cover it. That’s also true for British Standards like BS8201 and BS8203. These set the rules for proper flooring prep. Testing helps you stay within the rules. It’s not just about ticking boxes-it’s about protecting your work.
Increasing longevity of flooring systems
Floors that go down dry stay flat longer. It’s that simple. When you measure moisture first, you can deal with damp properly. That means the adhesive sticks better, the boards stay put, and the surface lasts years instead of months. If you want a floor that goes the distance, it starts with moisture testing.
Provides objective acceptance evidence for sign-off
Flooring projects need proof that conditions are right before handover. Moisture testing gives measurable results that can be shown to clients, contractors, or inspectors. This evidence shows that the floor was installed on a suitable base and that the job meets the agreed standards. Without this, any later dispute about floor failure can be difficult to settle. A clear test report removes doubt, builds trust, and confirms that the project has been completed correctly.
When Should You Conduct a Floor Moisture Test?
Not sure when to test? It depends on the job. But in most cases, the earlier the better. Moisture levels change over time, so testing at the right moment helps you make the right call. Here are key times to do it.
New Construction Projects
Fresh concrete needs time to dry. It might look ready, but deep inside it can still be wet. That’s where problems start. Before putting anything over it, you should test the moisture content. This tells you if it’s ready or not. Better safe than sorry.
Before Fitting Carpets and Underlay
Soft flooring can hide problems. If the subfloor is damp and you cover it, moisture gets trapped. That’s a recipe for mould and bad smells. Always test before laying carpet. You’ll avoid nasty surprises later.
After Water Damage or Flooding
Leaks, spills, or floods can soak your floor. Even when the surface dries, water might stay inside. A test shows if it’s truly safe or still too wet. Don’t guess – get a reading.
During Renovations
When you pull up old flooring, test what’s underneath. There might be damp areas from years ago. This is your chance to check and fix it before putting new flooring in place. It’s simple and smart.
Seasonal Changes
Weather changes things. In winter, heating can dry surfaces but leave water trapped below. In summer, humidity can make floors sweat. If you’re doing work during a big shift in weather, it’s a good idea to test.
Different Methods of Moisture Testing (UK Standards)
There’s more than one way to test a floor. Some methods go deep. Others are quick surface checks. The right one depends on your job, your materials, and how fast you need results. Here’s what’s common in the UK.
In-situ RH probes (ASTM F2170) – Reliable Subsurface Check
This test measures relative humidity inside the slab. A probe is placed in drilled holes and left to stabilise before giving a reading. It’s accurate because it shows the real condition inside, not just on the surface. That’s why it’s considered the gold standard in the UK.
Pros:
- Provides highly accurate readings of moisture conditions inside the slab.
- Recognised by UK standards and trusted by manufacturers.
- Helps predict how the floor will behave once sealed.
Cons:
- Takes 24 to 72 hours for results.
- Requires drilling into the slab, which some find invasive.
- Slightly higher cost than surface meters.
Suitable for: New builds, commercial projects, and any installation where long-term performance matters.
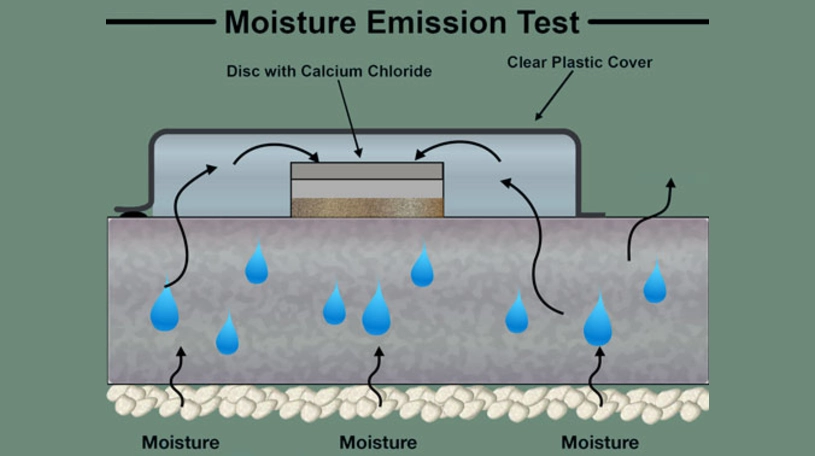
Calcium Chloride Testing – Surface Emission Test
This is more common in the US. It measures how much vapour comes off the slab. In the UK, it’s rarely used.
Pros:
- Simple to use.
- Can show surface vapour levels.
Cons:
- Doesn’t meet UK standards.
- Not as reliable as RH testing.
Suitable for: Dry climates or US-style projects, not recommended for UK installations.
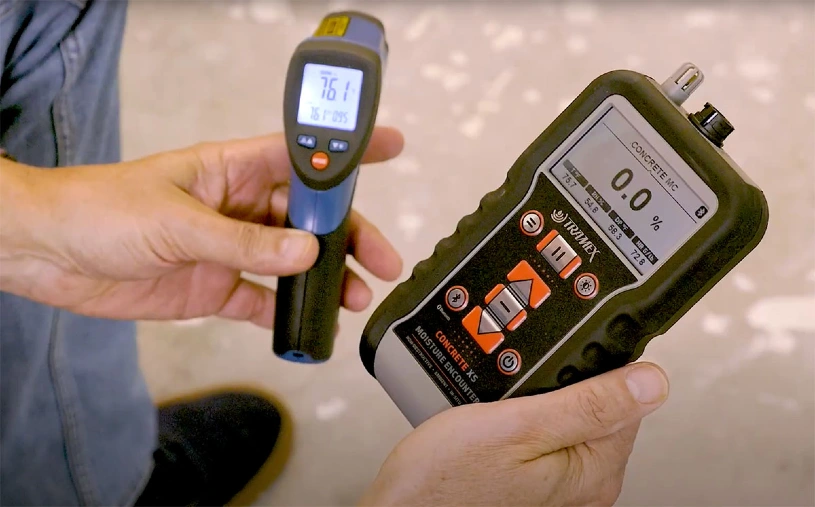
Moisture meters/dielectric mapping – Rapid Screening
This method uses handheld hygrometers or scanning devices. They measure surface or near-surface moisture quickly. They’re good for initial checks but less precise than probes.
Pros:
- Fast and easy to use on large areas.
- Non-destructive – no drilling needed.
- Helpful for spotting damp zones before detailed testing.
Cons:
- Only shows surface or shallow readings.
- Results can vary with material type.
- Not always accepted for warranty sign-off.
Suitable for: Quick surveys, residential projects, and early-stage checks before deeper testing.
What Happens If You Skip Moisture Testing?
If you skip testing, you’re working blind. You might lay a perfect floor on top of a wet base and watch it fail weeks later. Moisture rises, glue lets go, and boards warp. It’s frustrating and expensive. You’ll need to tear it all up and start over. That means more cost, more time, and more stress. One test could stop all that. It’s simple insurance for your flooring.
Moisture Testing and Floor Preparation by DC Flooring Experts
At DC Flooring, we test floors the right way. We use accurate tools to measure moisture content in concrete, screeds, and subfloors. Our team knows what to look for – and what to do if there’s a problem. If the moisture level’s too high, we’ll help dry it out or apply the right barrier. We follow British Standards and work with you to keep things on track. No shortcuts. Just proper prep and peace of mind.
Protect Your Investment Before It’s Too Late
Floors aren’t cheap. Replacing them is worse. Don’t risk a ruined surface because of something you could’ve tested. Moisture is sneaky – it hides deep and comes back strong. One quick check could save you from warping, lifting, or mould. Test now, and move forward knowing your floor is solid from the ground up. It’s the smart move.
FAQs
Can moisture testing prevent mould under the flooring?
Yes. If moisture is sitting under your floor, it creates a damp space where mould can grow. By testing first, you’ll spot these damp areas and deal with them before fitting the floor. That keeps mould from forming in the first place and protects your health and your home.
Can moisture levels in concrete change over time after installation?
They can. Concrete dries slowly and can hold water inside long after it looks dry. Seasonal changes or heating can also affect the moisture content. That’s why it’s smart to test just before installation. It shows the true condition at the time you need to know.
Is moisture testing required for all types of flooring installations?
It’s not always required, but it’s strongly advised. Wood flooring, vinyl, laminate, and carpets can all be affected by damp. Many manufacturers won’t honour their warranty if you skip testing. Even with tougher materials, it’s better to check than to take a risk.
How long does it take to perform a professional moisture test on concrete?
Some tests, like surface meters, give instant results. Others, like the RH test, take 24 to 72 hours. It depends on the method you use and how accurate you want the reading to be. Your installer will recommend the best option for your timeline.
How do contractors dry concrete slabs that fail moisture testing?
They might use fans, heaters, or dehumidifiers to speed up drying. In some cases, a damp-proof membrane is used to stop vapour from rising. It depends on how wet the slab is and how quickly the job needs to move forward. The key is to lower the moisture to a safe level.
What environmental conditions can affect floor moisture levels?
Warm weather, high humidity, poor airflow, and wet seasons all affect how much moisture stays in or comes out of the floor. Buildings that aren’t ventilated well can hold damp air. That’s why it’s best to test under normal site conditions, not during extreme weather.
How much does professional moisture testing typically cost in the UK?
It usually costs between £80 and £300, depending on the method and size of the area. Some contractors include it in their floor prep. Either way, it’s cheaper than replacing a failed floor. Think of it as a small price for peace of mind.
How does a damp proof membrane (DPM) work with moisture testing results?
If a test shows the floor is too wet, a DPM might be needed. This barrier sits between the subfloor and the flooring, blocking moisture and vapour. It keeps water from rising into the top layers. The right membrane depends on the reading, so testing always comes first.
What is the maximum acceptable floor moisture level?
It depends on the product and the method. Most flooring systems allow up to 75% relative humidity, but some are stricter. Always check the manufacturer’s guide and match it to the test results. Going over the limit risks failure, even if the floor looks fine at first.
- Key UK Compliance and Standards for Robotic Flooring - March 24, 2026
- Abrasion Resistance: Why It’s Critical for Industrial Floors? - November 11, 2025
- The Heel Drop Test: A Fast and Simple Way to Detect Delamination - October 30, 2025
